Introduction
Welcome to the image processing guide! You are free to follow any other tutorial if you like, however I recommend that you follow this one solely due to the fact that it is tailored to editing the image that is required for your task submission.
The software required for this task is Siril, which can be downloaded here. Photoshop or other software can be used, but Siril is preferred here as it is open-source, easy to use, and specific for astro-related tasks.
Processing Parameters
If you decide you want to follow another tutorial, here are the necessary details required for you to process:
- Object: Messier 8 (or Messier 20)
- Pixel Scale: 4.3µm
- Focal Length: 270mm
- Time and date: Can be left blank
Contents
Download StarNet here.
StarNet can be used with Siril. Install StarNet and make sure to select ‘Add to PATH’.
In Siril, open the hamburger menu on the top right of the screen and select Preferences. Then go to the Miscellaneous menu and under Software Location click select StarNet executable. In your file explorer window open C:\Program Files\StarNet2\bin and select the starnet2.exe file. Then after selecting it click on apply.
Opening and Basic Modifications
To start off, the first thing to do is open the file in Siril. Use the OPEN button on the top left of the window and select your file. Once open, rotate it to the left and mirror it vertically.
Then, at the bottom of the window click on where it says Linear and change it to AutoStretch. Then click the RGB chain link icon immediately to the right of the AutoStretch button. This should turn your image from a very bright green to a colour you would expect. Take a good look at the image. This is our starting point. Now, change it to Histogram view to better help with editing.
Background Extraction
Next step is background extraction. This is required to remove the light pollution gradients. Click on Image Processing, then select Background Extraction. Leave all your settings as is and then click on Generate.
Here you will see that the points do not cover your entire screen. This is not ideal as background extraction computes the gradient across your entire image and then subtracts it. Since it only covers a part of the image, it will not be able to gauge the background correctly. To fix this, slowly keep increasing the Grid Tolerance slider and generating the points until you see that each point is generated on the image. Ensure the value is as low as possible.
Now, the final step before finishing up is removing the points from on top of the nebulosity. This is done so that the gradient removal doesn’t accidentally remove the nebulae from the image.
Once that is done, you’re ready to click on Compute Background. Wait for the process to finish (you can check the command line on the right side) and then click apply. Your image now would appear to look very overexposed. To fix it, simply change the stretch mode back to AutoStretch like you had earlier.
Colour Calibration
Next up is correctly calibrating the colours on your image to resemble the actual colours of that portion of the night sky. First, you need to tell Siril what it is looking at so it can pull the real colours out of a database.
Click on Tools -> Astrometry -> Image Plate Solver. Here, enter the name of the object in your frame, your focal length, and your pixel size (check the parameters list above). Leave all other settings at default and click OK.
Next, we actually need to calibrate the colours. Open Image Processing -> Colour Calibration -> Photometric Colour Calibration. Leave everything at default and click OK.
Starless processing can be very helpful editing astro images especially when the stars are very dense and of a lot of different colours, all while the nebulosity and actual targets in the image are also of many different colours. Processing stars and the starless image separately have one main advantage, which is that you can bring out the details in the nebulae/galaxies without worrying about ruining the stars.
This step can only be done if you downloaded StarNet earlier. If you haven’t yet downloaded StarNet, scroll up to the optional step and download StarNet and point Siril towards it and return.
Now, open StarNet by selecting Image Processing -> Star Processing -> StarNet Star Removal. Leave everything at default and run it. This will take anywhere from twenty seconds to a few minutes depending on your computer. After it is done, note where it saves the star mask file. Close StarNet for now.
Stretching the Image
Next is to stretch the image. Stretching is a way to bring out the hidden data in the pixels. Change the image view mode to Linear from the view mode selector at the bottom.
Click on Image Processing -> Stretches -> Histogram Transformation. I recommend you autostretch the image and then work upon it. Click the Autostretch Image right above the Clip (%) button, and you should see your image look significantly better.
Move the midpoint slider to the left to brighten the image up and move the black point slider (one on the left) to the right to shift the black point. Ensure you do not move the black point too much to the right such that the marker crosses the leftmost point of the histogram, which will cause you to destructively clip data.
Keep making changes and clicking Apply. After you’re happy with your edit click on Close. Now your image is stretched and is no longer linear.
Basic Curves Transformation
Now the next thing to do is a curves transformation, which allows you to make non-destructive changes and small adjustments. Open the window by going to Image Processing -> Stretches -> Curves Transformation. A good place to start would be a simple S-curve. From there you can deselect colours and adjust accordingly. Keep in mind, clicking on a colour deselects the colour and changes the other two. Play around with it until you feel the image looks good.
Final Adjustments and Export
Modify the saturation of your image to your liking by opening Image Processing -> Colour Saturation. Change your hue depending on which colour(s) you want to increase saturation for, then adjust the amount.
This is only applicable if you’ve processed your starless image independently. After adjusting your saturation, make sure you save your image. Do this by clicking the save button on the top right of your window. Note the path where the image saves.
Open Image Processing -> Star Processing -> Star Recomposition. It will ask you if you want to close your current image, click yes (ensure you have saved your image earlier). Under Background Stretch Parameters select and open your starless file from the location you had noted earlier. You should see your starless image pop up in the background. Now, under Star Stretch Parameters, open your starless image. You will not be able to see any change in your image yet.
Now slowly increase the Stretch Factor till you feel happy with the brightness of the stars. You can play around with the other three sliders under Star Stretch Parameters till you find the sweet spot for your image. Ensure you do not change anything under Background Stretch Parameters on the left side. Once you’re done, click apply under Star Stretch Parameters and then click close.
If you want to crop your image, simply drag your mouse on the image until you get a selection you like. You can even resize and move your selection. Then right click and select Crop -> Crop.
Finally, your image is done being processed! To save, simply click on the Download button beside the save button on the title bar and export as JPEG.
If you have followed all the steps outlined in this guide using the provided dataset, your final result should look something like the image below. Please don't worry if yours doesn't match perfectly! Astrophotography editing is a highly subjective art form. What ultimately matters most is that you are happy with how your final image looks.
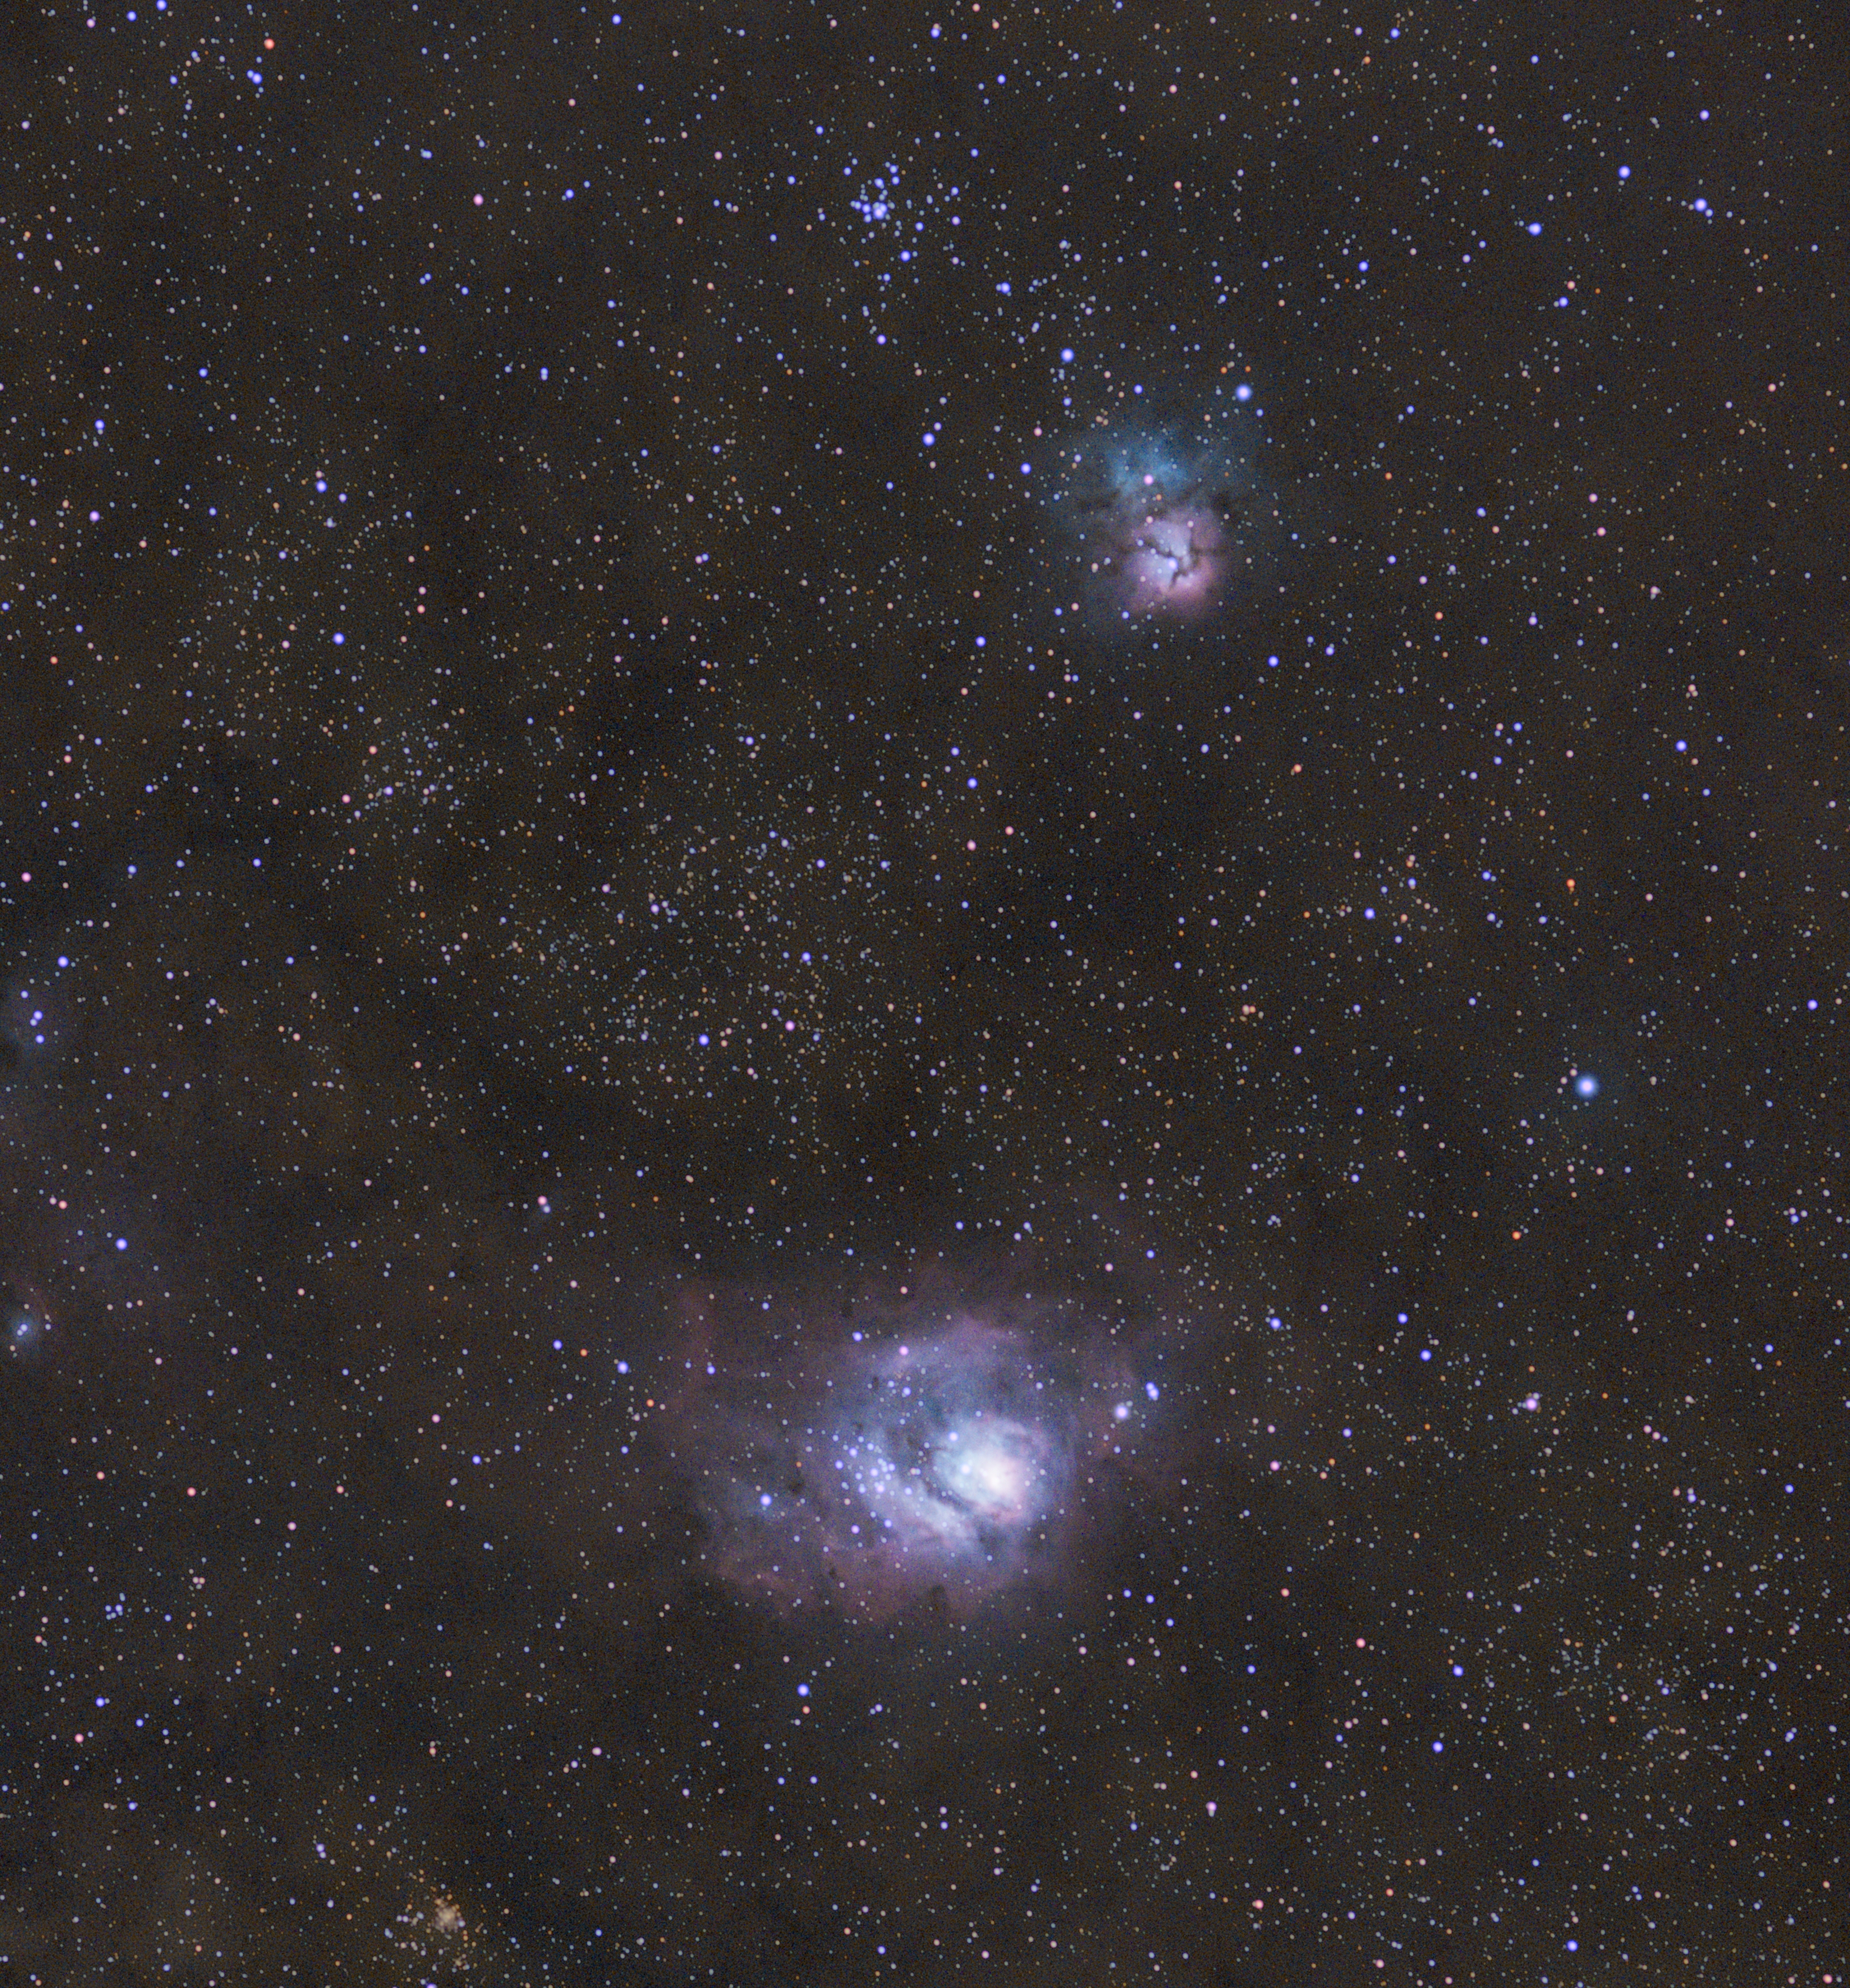
Hopefully this guide helped you process your image better. If you feel you are stuck anywhere, feel free to contact me. Best of luck!
Spandan Mohanty
7305200478